OneDrive

Generic filters

Getting started with OneDrive

We have put together a curated collection of walkthroughs to get you started with OneDrive and help your understand

how to get the most from it. Click on an article to get started.

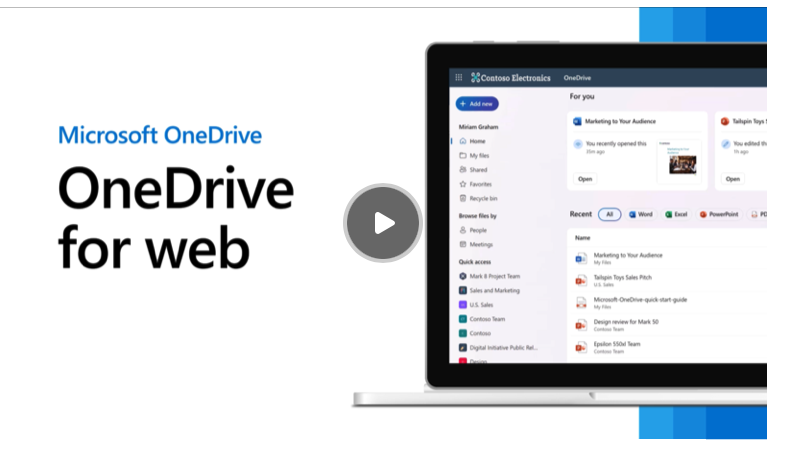
Alternatively, we have provided links to Microsofts support site for video tutorials as well.

Step 1: Sign In to OneDrive

  1. Open the OneDrive app (if it’s not installed, download it from the Mac App Store).
  2. Enter your @sd79.bc.ca email address and click Sign In.
  3. Enter your password and complete any two-factor authentication if prompted.

Step 2: Choose Your Folder Location

  1. Review the default location for your OneDrive folder (usually under your user profile).
  2. Click Next to accept it.
  3. Click through the brief introductory tips until you reach the end of the setup wizard.

Step 3: Save Copies of Files to OneDrive

There are two quick ways to save your files:

  • Method A (Drag and Drop): Open Finder, locate the file you want to copy, and simply drag and drop it into the OneDrive folder in your Finder sidebar.
  • Method B (Save As): Inside any app (like Word or Excel), click File > Save As…, select your OneDrive folder as the destination, and click Save.

💡 Quick Tip: By default, OneDrive on Mac uses “Files On-Demand.” This means files you drag over will live in the cloud to save disk space, showing a little cloud icon. If you want a file kept permanently on your Mac’s hard drive too, right-click the file and select Always Keep on This Device.

Step 1: Open OneDrive Settings

  1. Click the OneDrive icon (the little cloud) in your Mac menu bar at the top right of your screen.
  2. Click the Help & Settings icon (the gear/cogwheel).
  3. Select Settings from the drop-down menu.

Step 2: Turn on Folder Backup

  1. In the settings window, click on the Backup tab (or Sync and Backup depending on your version).
  2. Click the Manage Backup button.
  3. You will see your important folders listed (usually DesktopDocuments & Downloads). Toggle the switch to On for the folders you want to back up.
  4. Click Save changes or Start backup.

How to Check Your Sync Status

Once enabled, OneDrive will immediately start syncing those folders to the cloud. You can track the progress easily:

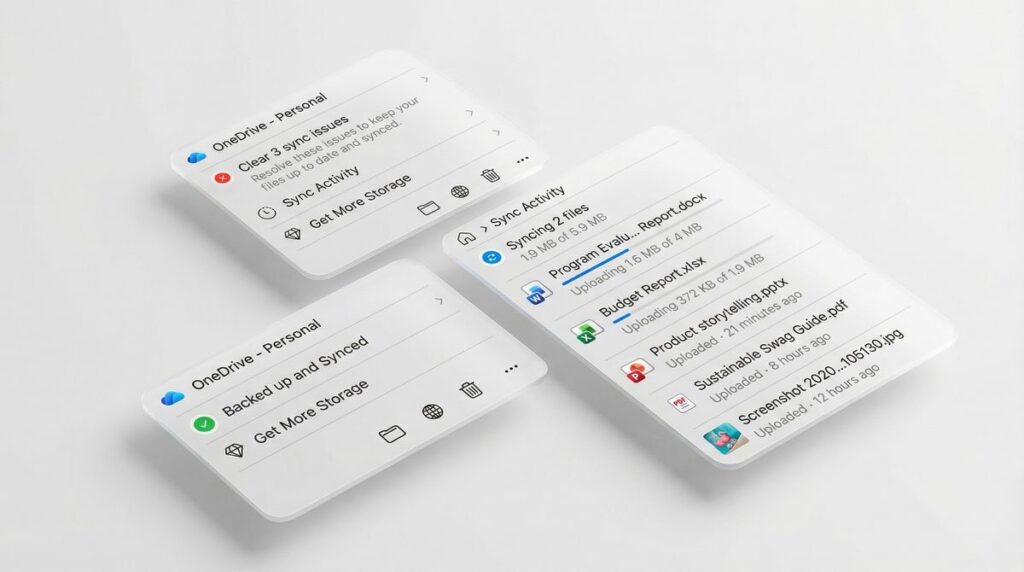
  • In Finder: Your Desktop and Documents folders will now appear inside your OneDrive folder directory, marked with syncing icons.
  • Status Icons: * A Circular Arrows icon means the files are currently uploading/backing up.
    • Green Checkmark means the backup for that file is complete and available offline.
    • Cloud icon means the file is backed up safely in the cloud and isn’t taking up space on your Mac.

⚠️ Note: If you get an error, make sure your files aren’t open in another app!

How to Turn Files On-Demand On or Off

  1. Click the OneDrive cloud icon in your Mac menu bar (top right).
  2. Click Preferences option from the settings menu.
  3. Navigate to the Preferences tab.
  4. Under Files On-Demand, click the button to either Download files as you use them (default) or Download all OneDrive files now.

What option is best for me: Benefits of Each

To help you decide which setup fits your workflow, here is how they compare:

SettingHow It WorksBest ForKey Benefits
Download files as you use them (Default)Files live in the cloud. They only download to your Mac when you double-click to open them.• Smaller hard drives
• Large cloud storage
• Saves massive disk spaceon your Mac.
• Files don’t take up local storage until needed.
• You can still see your entire folder structure.
Download all OneDrive files nowEvery file in your OneDrive is fully downloaded and mirrored onto your Mac’s hard drive.• Frequent travelers
• Computers with large storage
• 100% offline access to all files anywhere.
• No waiting for files to download before opening.
• Faster local workflows for massive apps.

💡 The Middle Ground: You can leave Download files as you use them ON to save space, but right-click specific, crucial folders (like an active project) and select Always Keep on This Device… This gives you offline access to just your important files while keeping the rest in the cloud.

Step 1: Open the Share Window

  1. Open your OneDrive folder in Finder.
  2. Right-click (or hold Control and click) the file or folder you want to share.
  3. Select Share from the context menu (it usually has a little blue cloud or person icon next to it).

Step 2: Choose Your Colleague

  1. In the “Send link” pop-up, start typing your colleague’s @sd79.bc.ca email address.
  2. Select their profile from the autocomplete dropdown list.
  3. (Recommended) Type a quick message to give them context!

Step 3: Set Permissions & Send

  1. By default, the link is usually set to “People in the Cowichan Valley School District with the link can edit.” If you want to change this (e.g., change it to View only so they can’t make changes), click the Gear icon or the permission text link to adjust the settings.
  2. Click Send. They will instantly receive an email notification with a link to the file.

🔗 Alternative “Copy Link” Method: If you just want a quick link to paste directly into a Teams, or text message to a colleague, click the Copy Link button at the bottom of that same Share window instead of typing a name. Because they are in your same tenant, they will automatically have access when they click it.

Collaborating via a OneDrive Folder

If you just need to work with one or two people on a temporary project, creating a shared folder on your Mac takes seconds:

  1. Open your Finder and go to your OneDrive folder.
  2. Right-click anywhere in the blank space, select New Folder, and give it a name (e.g., “Spring Break plans”).
  3. Right-click your new folder and select Share.
  4. Type your colleagues’ @sd79.bc.ca email address, ensure the permissions say “Can edit,” and click Send.

Any files you or your colleagues drop into that folder will instantly sync, allowing all of you to open, edit, and co-author documents in real-time.

When to Switch to SharePoint (The “Me” vs. “We” Rule)

While sharing a OneDrive folder is great for quick, small-scale collaboration, it becomes messy as your working group grows. For larger working groups, departments, or long-term projects, SharePoint is a much better solution.

Think of it this way: OneDrive is for “Me,” and SharePoint is for “We.”

FeatureOneDrive Shared FolderSharePoint Document Library
File OwnershipOwned by you. If you leave the organization, the folder and its contents disappear for everyone else.Owned by SD79. Files persist safely in a centralized space regardless of individual staffing changes.
ScalabilityHard to manage permissions as more people join. You have to manually track who has access to what.Perfect for large groups. Permissions are managed automatically by the Team or School.
OrganizationScattered across individual “Shared with me” tabs in people’s apps.Centralized hub that integrates cleanly with Microsoft Teams.

Summary: Use OneDrive if you are drafting a document alone or hashing out a quick concept with a teammate. Switch to SharePoint if you are building an ongoing repository of files that a whole team needs to access daily.

Step 1: Open the Scanner

  1. Open the OneDrive app on your iPhone (make sure you’re signed in first!)
  2. Tap the Camera icon at the bottom center of the screen (or tap the + icon and select Scan / Capture).

Step 2: Capture the Document

  1. Swipe through the options at the bottom to select Document (you can also choose WhiteboardBusiness Card, or Photo).
  2. Position your iPhone over the paper. A blue or white border will automatically appear to detect the edges.
  3. Tap the white circle shutter button to take the scan.

Step 3: Edit or Add Pages

  1. Adjust the borders by dragging the corners if the automatic crop missed anything.
  2. For multi-page documents: Tap the Add icon (the camera with a plus sign +) at the bottom left to scan the next page. Repeat this for all pages.
  3. Tap Done or Finish once you have scanned everything. You can then use the options at the bottom to rotate or crop.

Step 4: Name and Save

  1. Type a clear File Name for your new file.
  2. Tap the location field underneath the name to choose the specific OneDrive folder where you want to save it.
  3. Tap Save (or the checkmark) in the top right.

💡 Quick Tip: Because OneDrive syncs instantly, the PDF you just scanned on your iPhone will be waiting for you in the Finder sidebar on your Mac within a few seconds! This is one of my favourite pro-tips to show folks!

Alternatively, Microsoft has a wealth of video walkthroughs for both MacOS, PC & mobile. Additionally, for folks that use OneDrive on the web, you can use all these features & more.